Split Charge Installation.
Well the other week I stripped the van so I could see what was what. Had to figure out how I was going to route all the cables from the main battery to the leisure battery. The aim was to locate the leisure battery under the drivers seat.
 Dashboard area panels - stripped! |
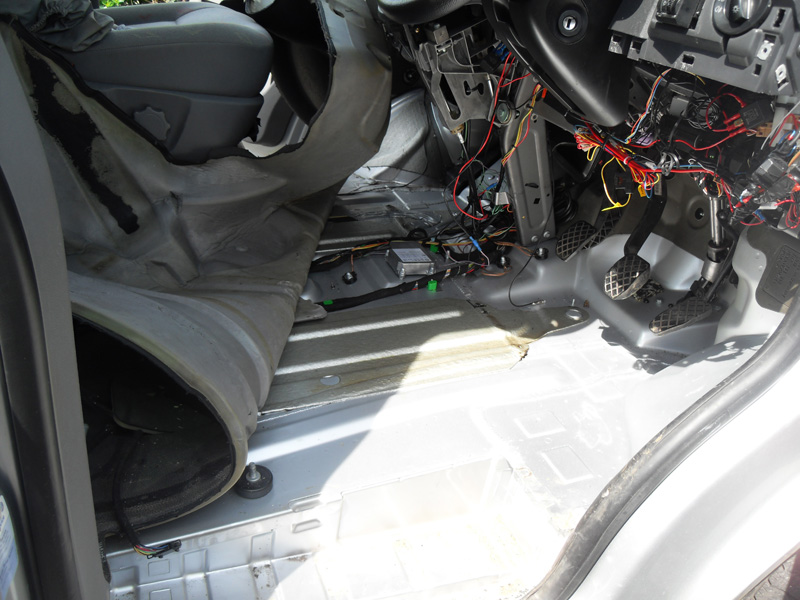 Front Cab Carpet Peeled Back |
Now I know it looks very messy, the reason for this is…. that it is messy! I installed the mess about 4 months after I got the van in 2006. Included in the mess is:
- Pioneer Sat Nav wiring (below the gear stick);
- Snooper wiring;
- mobile phone wiring;
- wiring for 2 x rocker switches and relays:
- one to activate the reversing camera when going forward – to check up on the boat I’m towing;
- the other to switch off the reversing sensors whilst reversing with a trailer (Don’t the sensors know that I know I’ve got a trailer hooked up behind me?)
Next the carpet was peeled back – had to see what was under there after all. Last time I looked, I was installing the Sat Nav units under the passenger seat.
The route was eventually decided to go from the leisure battery under the drivers seat, to the middle of the van and up alongside the airbag unit. Up the center console, do a left behind the glovebox, and through the grommet into the space where the wiper motor and air intake sits.
So that was how to get the cable into the engine bay area, next was where to locate the VSR and Mega Fuses. I opted to put the Main Battery Mega Fuse on the battery tray. The VSRÂ needed to be out of the way, in a dryish area, not on a panel that was designed to be removed. Decided upon the inside front left wheel arch wall.
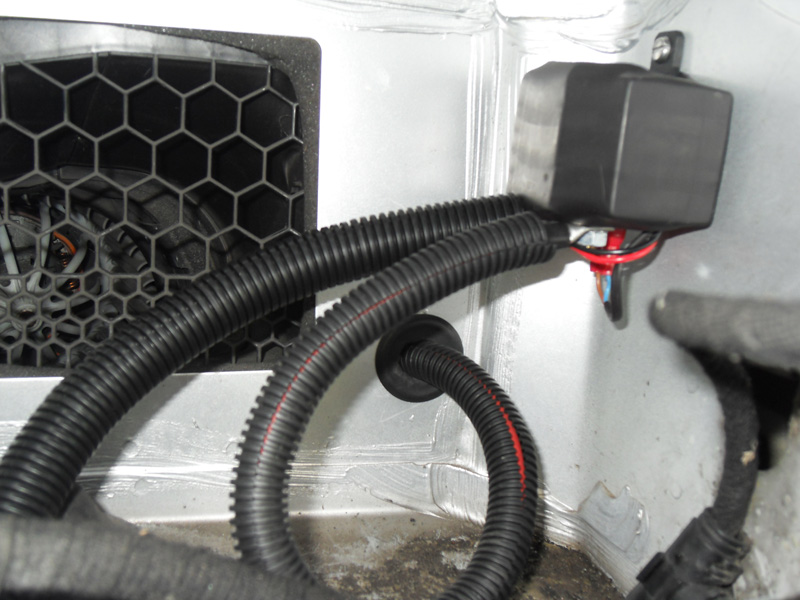 80-120Amp VSRInstalled. |
 Cables into Battery Compartment |
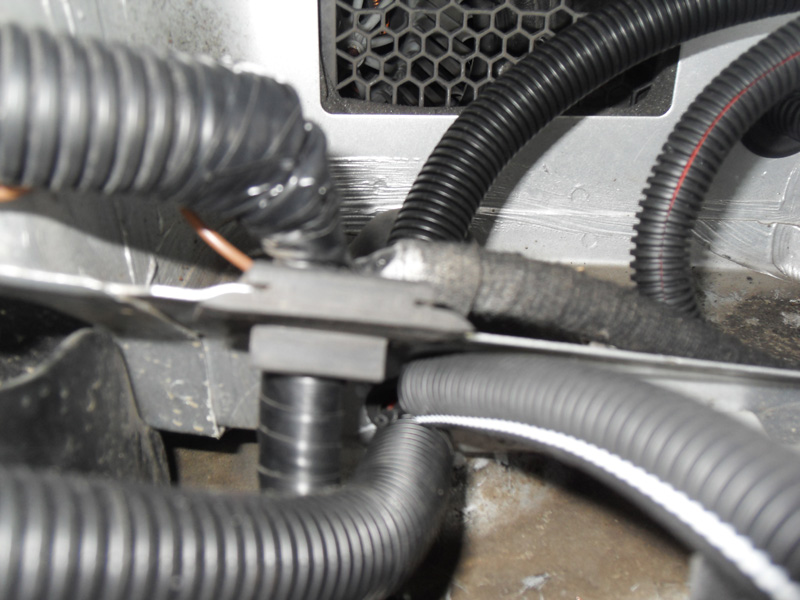
 VSR monitoring cables installed. |
An easy option to get the cables (25mm & 2 x 1.5mm for VSR monitor) through to the main battery would be to drill through the removable plate (not in pic as it has been removed!). But this would make things difficult if needing to do work in there. So a new hole had to be made. This can sort of be see in pic 2. Hole drilled, painted and rubber grommet installed – same as used in standard domestic electrical backboxes.
Pic 3 / 3 shows the VSR monitoring cables installed and connected onto the battery terminals.
Big thing I noticed that could be a problem for most folk, was the crimping of the 25mm copper lugs. I asked on the forum and some people use pliers then solder! Fortunately, I work on the railway and we have hydraulic crimpers that can do this sort of thing. You can buy ratchet crimpers for this size lug – first result on google search found these from Farnell (not the cheapest). Whatever you use, make sure you test the crimp connection by giving it a good tug to try and pull it appart. Don’t want any fires!
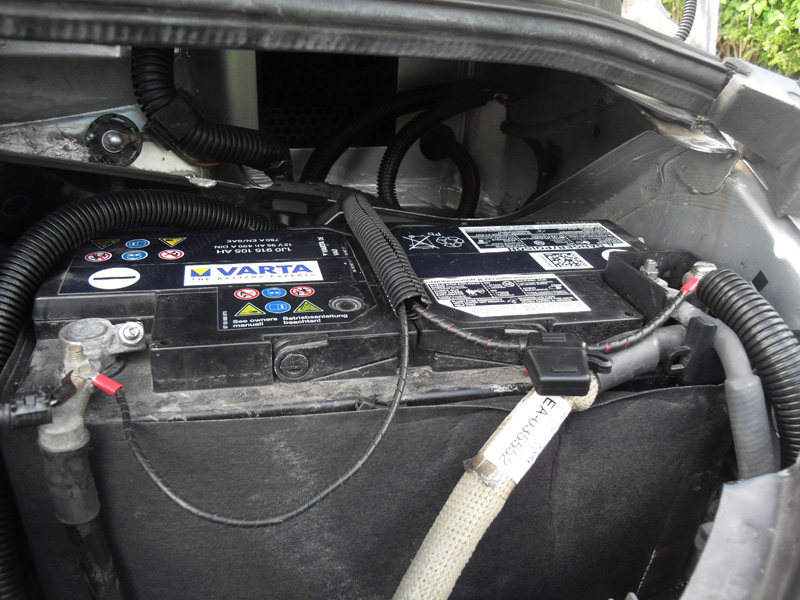
Final engine bay pic showing the Mega Fuse installed on the battery tray:
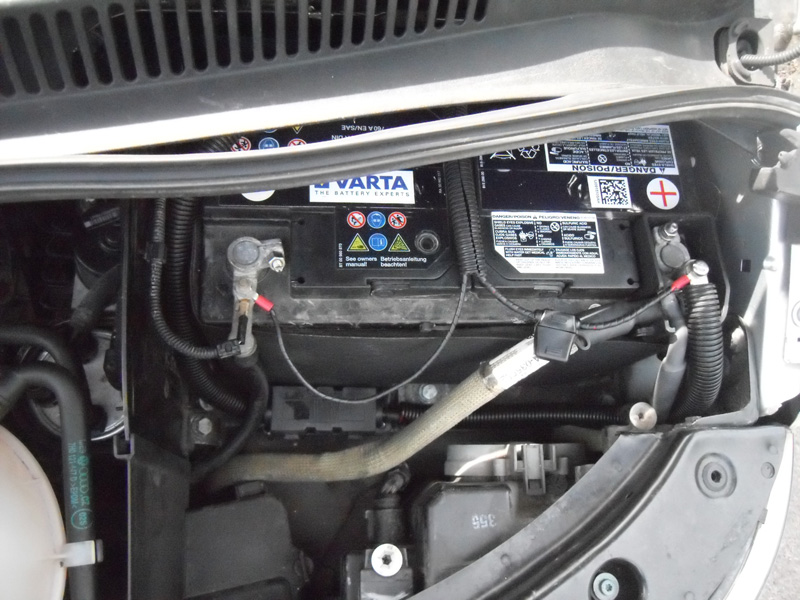
Main Battery Mega Fuse
Right – Now the other end!

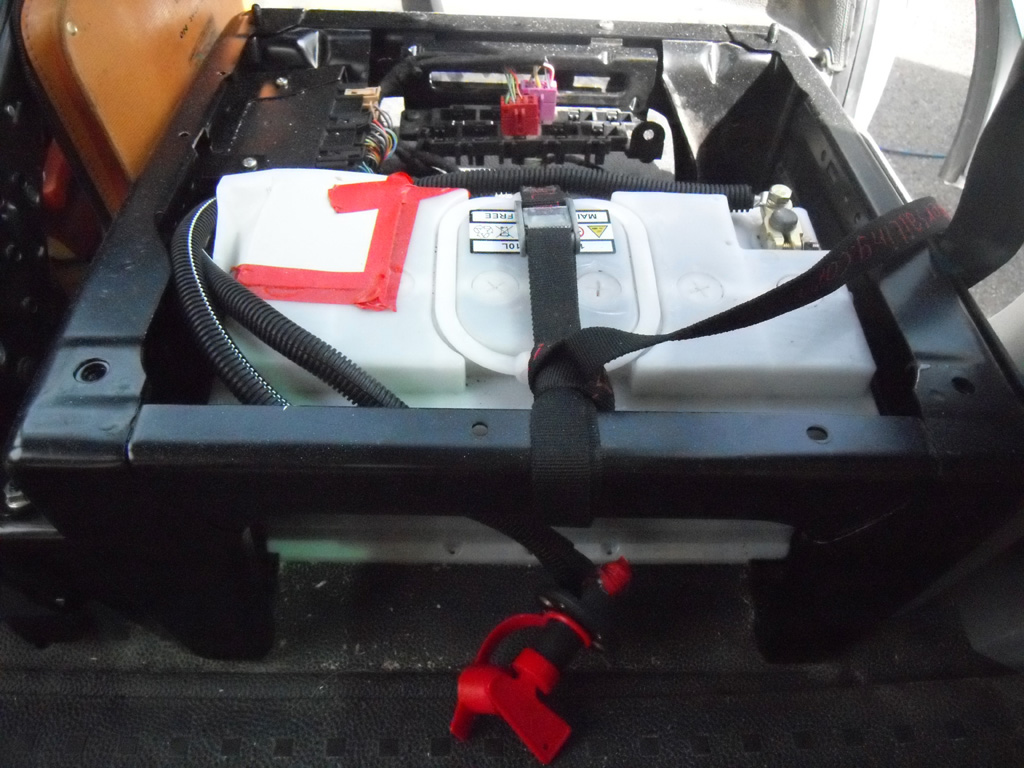
Leisure Battery in and strapped down
So I routed the 25mm +ve cable down the middle of the van passed the airbag control unit / sensor, then turned to the drivers seat. I had to a bit of jiggery pokery with the plug coupler bracket and the box of electronics (not sure what that is for), so I could squeeze the battery in. I didn’t take a before pic, but to the right is an after pic.
| BIG NOTE HERE: BEFORE you undo all four nuts for the seat box and or the two nuts on the handbrake lever, make sure you leave your van in gear or chocked as you will be realeasing the handbrake by removing it from its mounting point. |
So seat box removed, drilled a couple of new holes to relocate the little box of electronics, one additional hole for the connector bracket, two holes in the bottom for the batten of wood to hold the battery down and the strap to wrap round. The wooden bar on its own will not hold the battery in place. You either need some metal brackets on the other side of battery – using the existing seat base bolts, or a strap like I used. Don’t want this puppy flying around.
 Leisure Battery & Mega Fuse |
 Leisure Battery & Isolator Switch |
The battery terminals need to have proper insulated covers / caps to stop any short circuiting on the underside of the seat. Temporarily, the +ve terminal has a piece of cardboard in place.
The +ve cable was brought up through the hole in the matting – with all the other cables, in its flexible split conduit – used for the entire length of the run, and curled it round onto the Mega Fuse located on the wooden batten. From the Mega Fuse, curled it up and connected to one side of the battery isolator which is to be located on the back of the seat base. The other side of the isolator is connected to the battery +ve terminal.
The -ve / earth of the leisure battery, I connected to the earth stud just to the front of the hole in the flooring the cables come through in the seat base.