Insulation
Insulation:
B&Q recyled plastic bottle insulation. www.diy.com Selected this because:
- It is safer / healthier than rockwool for starters;
- You get more for your money than the sheeps wool for B&Q;
- You can stuff it into holes better than polystyrene or celotex boards;
- It doesn’t make squeeky noises like polystyrene or celotex boards;
- Quicker and easier to install.
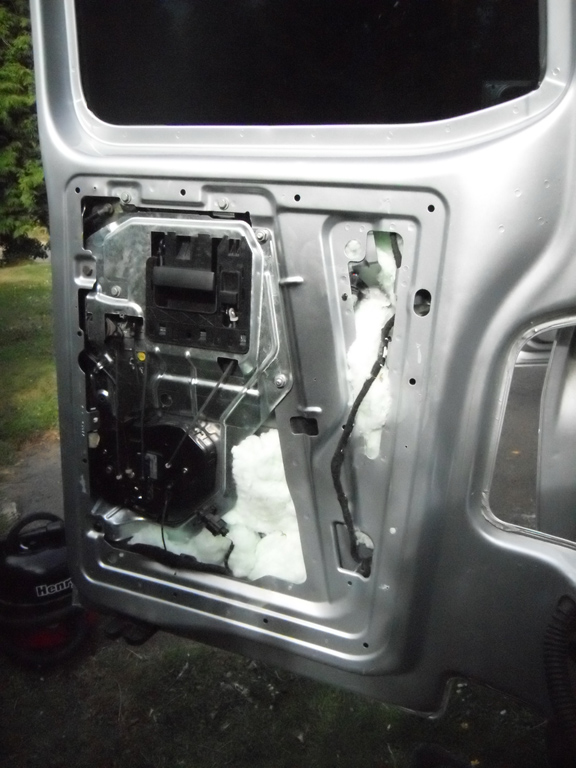
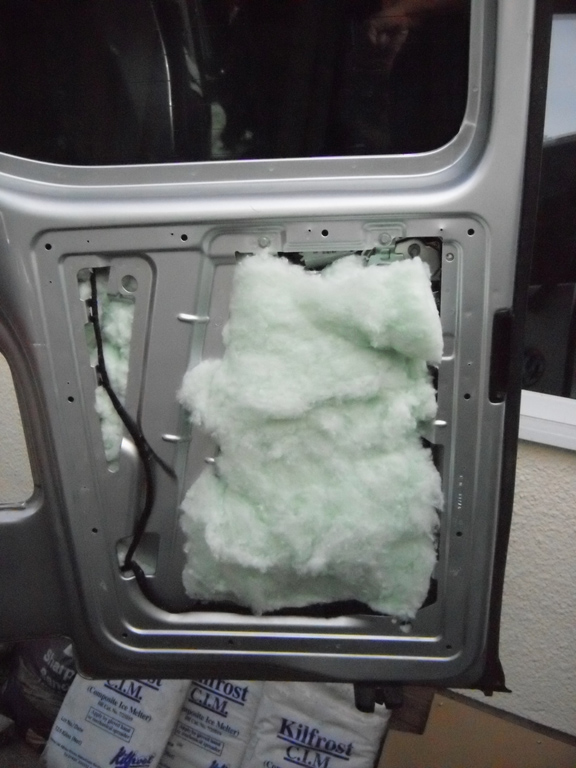
So after applying Dynamat to the bare metal, then Dynaliner or Camp Mat over the top, stuff the cavities with the insulation. I ensured I didn’t compact the insulation too much as it is the trapped air that makes the insulation work. Also had to make sure that the insulation didn’t stray into the moving parts of the locks and handles etc.
 LHD Insulation |
 RHD Insulation |
Comments
Comment from Pete
Time 22nd March 2013 at 09:29
Hi Duncan, I realise I am way way way late in replying, but reply I will!
The grey bits in between the panels are patching already applied to the ridges of the panels. I did not bother applying dynamat to these. I applied the dynamat to the thinner areas of panelling.
To strip the panels out is easy and quick. To carpet the panels – scary in that you don’t want to mess it up, but really quite simple in the end. You just have to do one and learn as you do it.
– Line panel up on van and drill one fixing screw to hold panel. Drill several more screw holes
– Lay carpet out,
– lay panel on carpet,
– cut out carpet 4 inches wider than the panel all round,
– flip all back over,
– spray panel,
– peel carpet over the sprayed panel,
– flip panel over (now face down),
– spray glue one edge of back of panel at a time and stick border down,
– Fix panel to van.
45 minutes ish depending on size of panel?
The wheel arches are covered in “Dynaliner” sound deadening material – way expensive for the quantity you get!
Pete
Comment from Duncan
Time 6th February 2012 at 18:56
Hi Very useful blog. I have just picked up a Kombi and have been looking through this with interest. I am totally new to this, but have pretty much the same intentions as you had. So couple of questions, sorry cant seem to see an email link: How long did it take you to strip the panels, Dynamat and insulate? This I feel i could do myself no problem. The carpeting looks tricky, how long did this part take (excluding the nifty logo work).
I also notice that your Dynamatting seems fairly random, there seems to be alot on one roof panel but less on others. Can you let me know the secret of positioning this right? There also seems to be a grey material between your sheets of Dynamat, was this already here when you got the vehicle?
Lastly what did you cover the wheel arches with, as they seem to generate alot of noise.
Sorry to many questions polluting your nice clean blog.
Duncan