Lining the ply lining…
It is amazing what a deadline can do for you, Friday 9th July I have to have the van back on the road so to tow the boat to Lee on Solent Saturday morning for the ISO National Championships (http://www.isoracing.org.uk). Along with the fact I am unfortunately on day shifts next week instead of useful night shifts (where I can get loads done during the day), the pressure is on.
I’ve been avoiding doing the carpet lining for ages, mainly due to the worry about not having enough material to go round the metal work AND do the panels seperately. But today I did it, I carpet lined the two rear door panels, both with bonus features! But with advice from the T4forum gusy of “line the panels first then when you line the metal work any joints can easily be hidden”. I thought, hey lets go!
Spotted a nice little touch on a couple of build threads during my research…. an ebossed VW logo on the panels with lining (when I say lining from now on, I mean carpet lining, if I mean ply lining, I will say ply lining!) over the top.
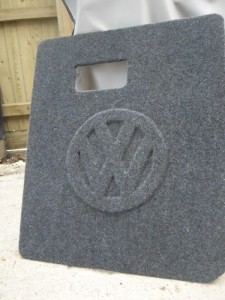
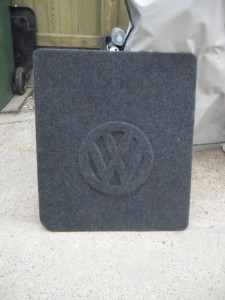
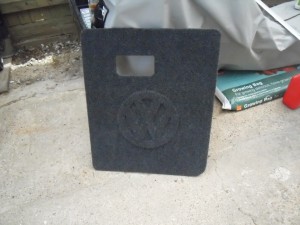
Here are my efforts on the the lower rear door panels:
I tried a different method on each panel, but due to the effectiveness of the spray glue, neither worked as desired. I wanted to be able to drag the lining into the grooves of the logo to make more of a definitive edge, but the glue just grabbed as soon as the lining touched the ply.
Method 1:
- Spray all the ply and all the lining;
- Drop / place the ply onto the lining;
- Turn over face up;
- Work the lining into the corners of the logo;
Method 2:
- Line the ply face up with the lining over the top;
- Spray just the logo;
- Spray the area on the lining that will touch the logo;
- Gradually work the lining into the corners as it is layed over the logo;
- Spray the rest of the ply and lining and run into place.
Niether were perfect, but I still think the effect is good.
How to emboss….
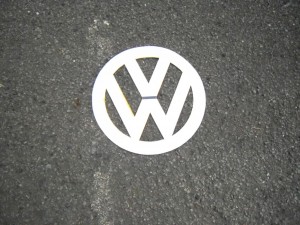
Print out logo to relevant size (Mine was printed on A4 with “Scale to media – YES”:
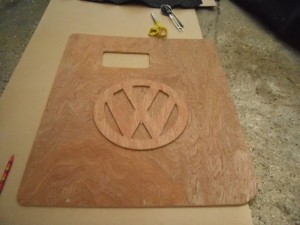
Cut paper logo out:
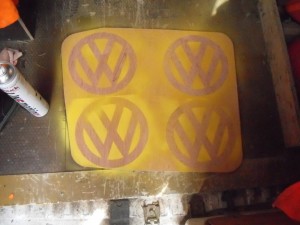
Draw round paper logo on a piece of ply. Well I tried to draw round it, but it was too difficult (paper kept moving), so I used the paper as a stencil and sprayed the logo on to the wood – four times.
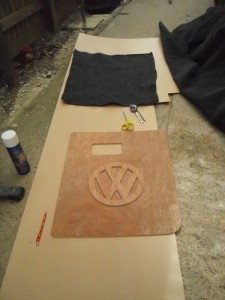
Cut the ply logo’s out and PVA onto panel (and leave to dry):
Cut a piece of lining out – slightly bigger than the ply panel:
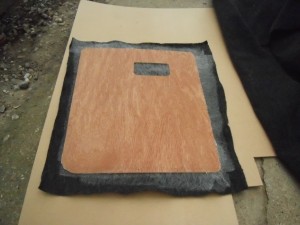
Spray the contact adhesive onto the lining and the ply, then lay ply ontop of lining:
Turn panel over and work material into the logo:
Sorry no pic
Turn panel back over and practice your wrapping skills:
Sorry no pic
Then that should be it:
Nice work!
Comments
Comment from insulated panels
Time 21st March 2013 at 22:47
I do not know if it’s just me or if perhaps everybody else experiencing issues with your site. It appears like some of the written text within your posts are running off the screen. Can someone else please comment and let me know if this is happening to them as well? This might be a problem with my browser because I’ve had this happen previously.
Kudos
Comment from Pete
Time 22nd March 2013 at 09:31
Always good to try different techniques Peter. I think the end effect looks great!
What browser etc are you using Kudos?
Comment from Pete
Time 22nd March 2013 at 09:32
My only downside Peter is how to cover the handle area? The issue is that the original plastic one now doesn’t fit! Any thoughts / photos?

Comment from Peter
Time 19th August 2012 at 21:58
Copied most of your idea for the embossing but when it came to glueing I tried something different which I think worked well.
I sprayed the panel and then stuck the ply cut out onto the spray so all the bits with holes had glus on them – then I started at the centre with the carpet and eased it into the voids and pressed firmly till the carpet stuck in the voids and used a har dryer to stretch it in.
Then I sprayed the rest of the panel and stuck the carpet as normal.
Quite pleased with the result